Here's the instructions for the DNS-320. Instructions followed at your own risk. You are advised to wear an anti-static earthed wrist band and avoid wearing clothes that are likely to generate static electricity.
Note: It may be possible to replace the battery after step 3 by then continuing at step 10.
1. Backup the data on the HD and/or ensure you can restore it. Log-on to the ShareCenter and save your configuration settings to your PC just in case (see System Management / System Settings).
2. Remove the lid.
3. Remove the HD by lifting vertically.
4. Remove the 2 black screws at the top back.
5. Turn the unit over and with a wide flat screwdriver remove the 4 feet pads.
6. Remove the 4 small silver coloured exposed screws.
7. Pull the innards forward about 10mm and then lift the whole innards up vertically.
8. Remove the 4 screws at the sides holding the front panel onto the metal frame.
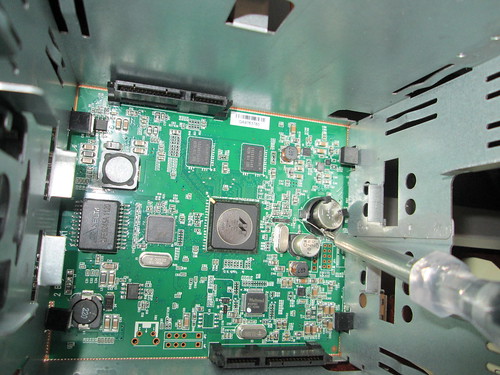
9. At this point I realised that in order to remove the printed circuit board I had to remove the 4 nuts positioned in each corner. I therefore decided to try to remove the battery in-situ.
10. Using a small long screwdriver pull the spring clip holding the battery out until it cleared the top of the battery and then levered the battery up so the clip was pressing against the side of the battery. It may be easier to continuing levering the battery up, by using one of the holes in the side of the metal chassis. Hold the unit almost upside down so that the battery falls out rather than falling onto the printed circuit board.
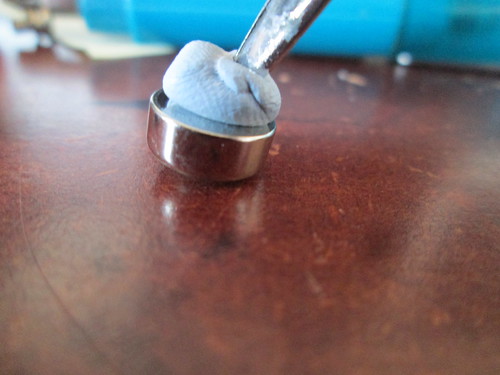
11. Use an envelop opener and some sticky putty (trade name BluTack) to hold the new battery to the envelop opener.
12. Lower the battery into the unit and catch the edge of the battery under the 2 protruding black plastic lugs that secure the battery in its holder. The battery is now at an angle with the clip underneath the opposite side.
13. Hold the envelop opener in the other hand and the in your main hand use the screwdriver to prise the spring clip out until it is against the side of the battery. With the screwdriver push the battery down until the spring clip goes over the top.
Step 12 and 13 are the trickiest steps and may take some attempts.
14. Reassemble in reverse order. Note that there are L shaped lugs on the side of the chassis that go into the V shape recesses in the plastic walls near to the front of the unit.
Photos
Step 7
Step 10
Step 11
Step 14 Note: Innards are outside the unit. Right-hand lug and left-hand V groove.


 Author
Topic: [Solved] Clock is no keeping time up-to-date. (Read 13622 times)
Author
Topic: [Solved] Clock is no keeping time up-to-date. (Read 13622 times)